



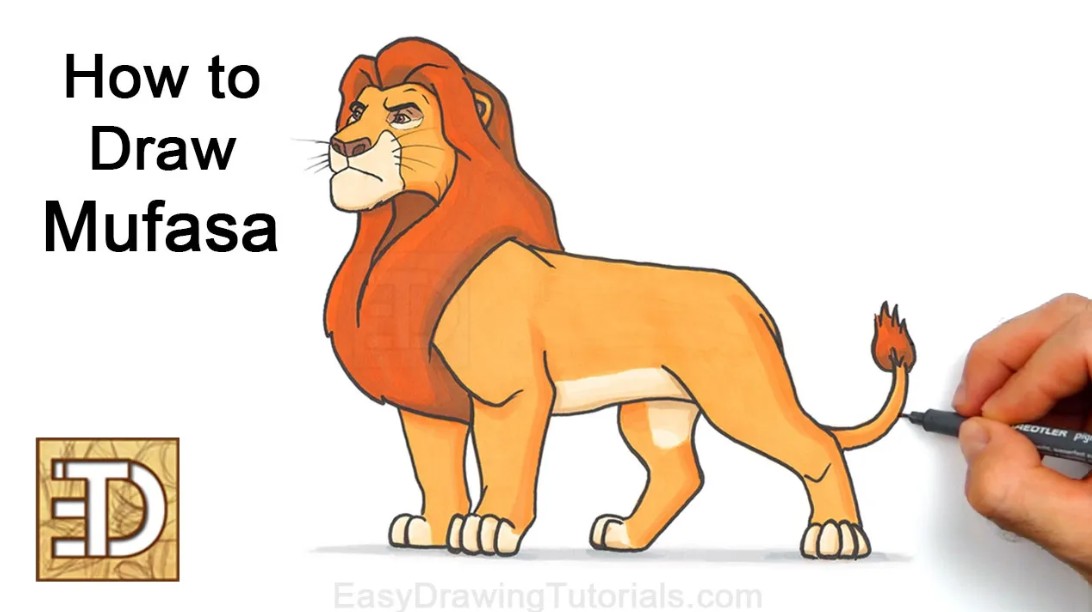
Use the super easy step-by-step instructions below to learn how to draw Mufasa from The Lion King. Follow along with the video, or use the images in this article. By the end of this tutorial, even beginners will have a completed drawing of Mufasa from The Lion King!
Love drawing? Keep your artistic streak going and stay "tooned" for more free art lessons by:
- Bookmarking the EasyDrawingTutorials.com homepage for updates
- Subscribing to the EasyDrawingTutorials YouTube channel
- Visiting How2DrawAnimals.com for free animal tutorials
- Visiting How2DrawManga.com for free manga tutorials
This page contains Amazon affiliate links. If you choose to purchase through these links, I earn a small commission at no extra cost to you.
RELATED TUTORIALS
 |
 |
 |
 |
 |
Materials You’ll Need
Before starting, gather these basic drawing supplies:
- Pencil (an HB lead pencil is best for light sketches)
- Eraser
- Black ink pen or marker
- Drawing paper
- Colored pencils or markers
Sketch Guidelines
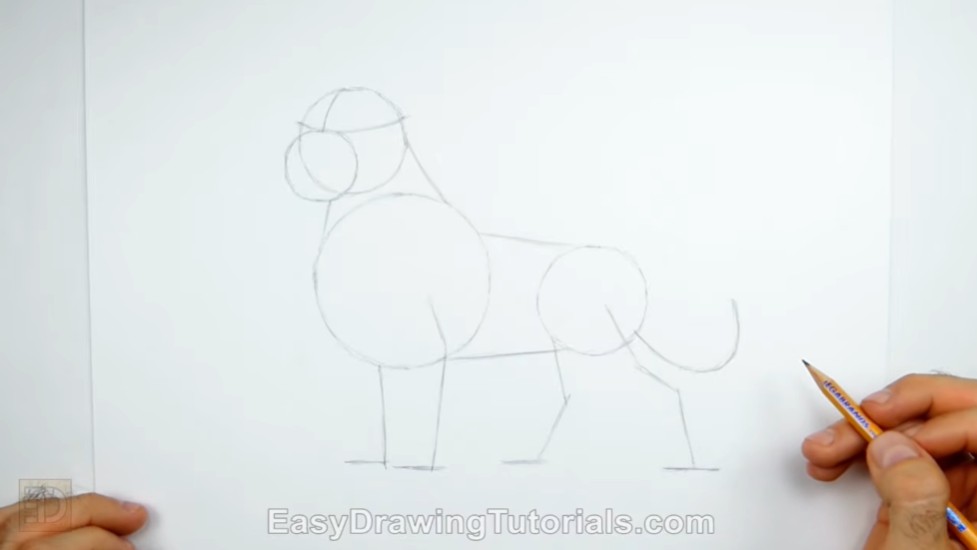
Building a solid initial sketch is key to getting your character's proportions right. Draw these simple shapes first before adding the details on Mufasa.
Step 1: Head and Body Framework
- Draw the Chest: Create a large circle in the center of your page to represent Mufasa's chest. Mark the intended height and width with small dashes before connecting them with curved lines. If you have trouble drawing circles freehand, trace the edge of a circular object, like a lid or bottlecap.
- Add the Back of the Body: To the right, draw a second circle that is about half the size of the first. Keep it relatively close to the chest circle so the body length stays proportionate.
- Position the Head: Draw a third circle on the top left side. Make it slightly smaller than the back circle and place it close to the chest so the neck is not too long.
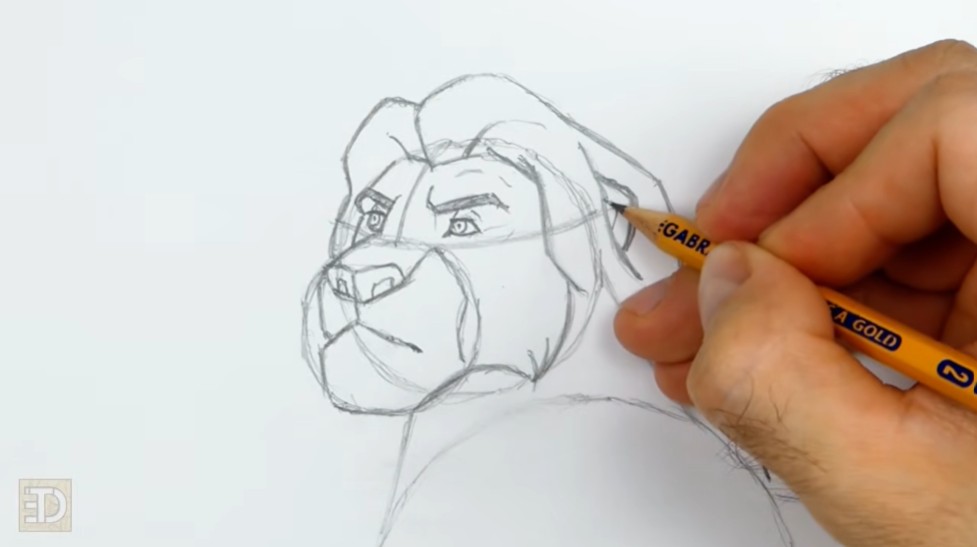
- Outline the Facial Guides and Muzzle: Add a curved horizontal line slightly higher than the middle of the head circle, and a curved vertical line down the top. Finish the guidelines by drawing a smaller circle on the bottom left for the muzzle.
Step 2: Drawing the Facial Details
- Create the Eyes: Sketch two small circles sitting on top of the horizontal guide. The eye on the left should be thinner due to the angle of the head. Darken the outlines and make the top line thicker for the eyelashes.
- Add Eyebrows and Nose: Draw thick, rectangular eyebrow shapes that slope down toward the center to create a powerful, furrowed brow. Below, sketch a heart-shaped triangle for the nose with two small rectangular nostrils inside.
- Define the Smile and Mouth: Under the nose, draw a short line that splits into an upside-down "Y" shape for the mouth. Extend the bottom line outward to form a large, chin.
Step 3: Drawing the Rest of the Body and Tail
- Shape the Powerful Mane: Sketch the inner frame around the face using thick, triangular clumps of hair. Create a wavy outer line that extends far to the left and covers the chest, making sure to leave just the tip of the ear peeking out.
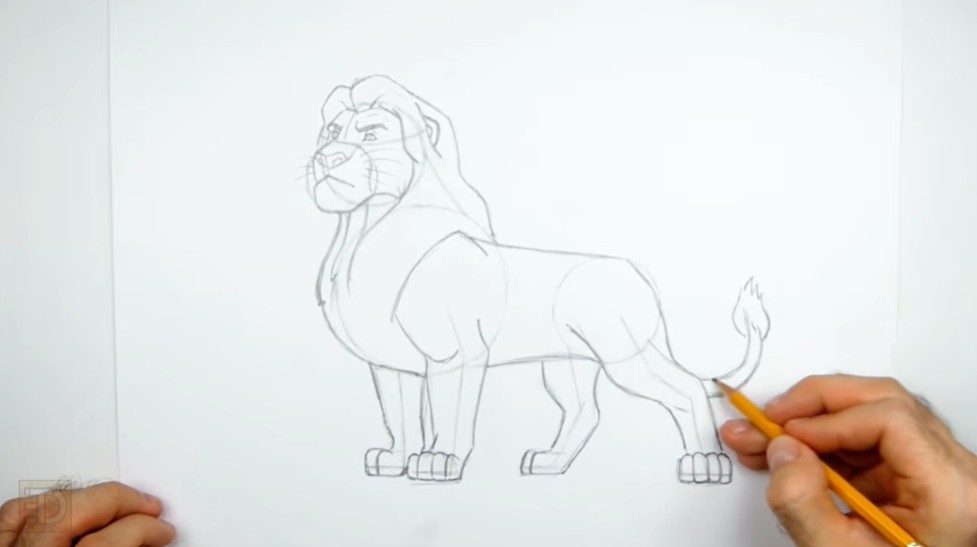
- Draw the Limbs: Fill out the thickness of the legs around your guidelines. Add rectangular blocks at the base of the legs, and use small arcs and vertical lines to define the toes.
- Add the Tail: Add thickness to the tail guide and end it with a large, pointy clump of fur. Add a few quick strokes on the sides of the muzzle for the whiskers.
The Finishing Touches
Now it's time to add the final sweeping details and add color to Mufasa!
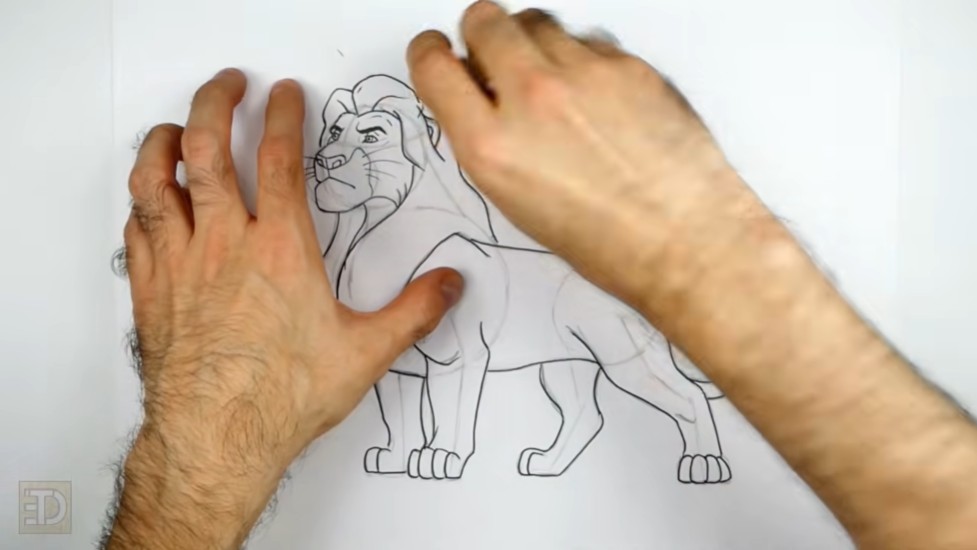
- Ink the Drawing: Trace over your final lines carefully with a permanent ink pen. Let the ink dry completely before moving on to the next step.
- Erase Guidelines: Use your eraser to remove all remaining construction circles and guide lines to leave a clean drawing.
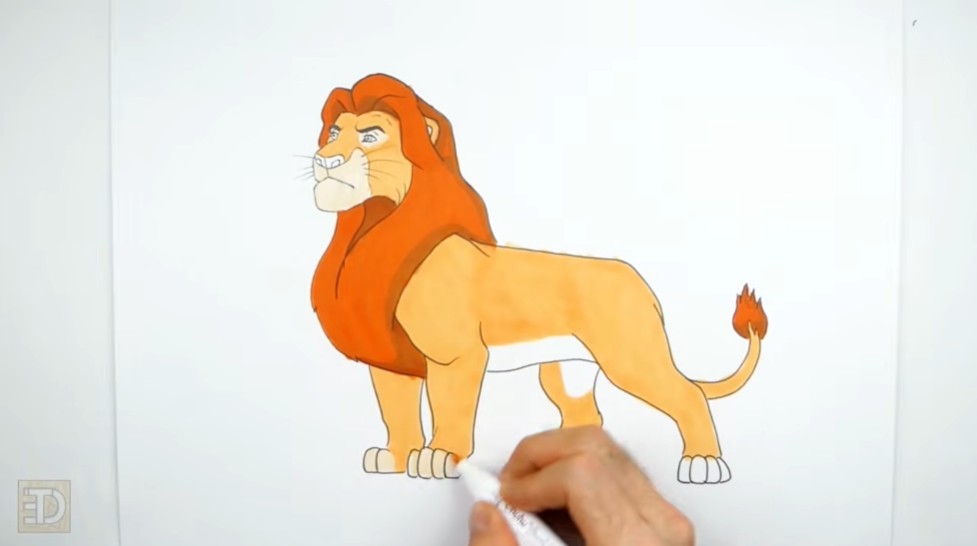
- Color Mufasa: Use rich gold and orange tones for the fur, and a deep brownish-red for the mane. Adding shading to the muscles and mane will help the character look more regal and strong.
Final Tips for Drawing Cartoon Characters
Improving your drawing skills takes practice and patience. Keep these techniques in mind:
- Sketch lightly before committing to final lines so mistakes are easy to erase.
- Use construction shapes to maintain correct proportions across the head and body.
With consistent practice, drawing characters like Mufasa from The Lion King becomes much easier and enjoyable!
RELATED TUTORIALS
|
|
|
|
|
Thanks for visiting! Subscribe to the EasyDrawingTutorials YouTube Channel for a new tutorial every week.
To learn how to draw animals, visit How2DrawAnimals.com.